Creating a Polygon
In GeoForce, there are two options for creating a polygon, drawing it free hand or selecting a predetermined territory definition:
- By Regions
- By Cities
- By Neighborhoods
- By Postal Code
Free hand drawing
Click on the button “Brush Options” in the lower right hand corner.
Brush Options panel will open. Select ‘Geo Division’ and hit Save.
Click on the “Create Polygon” button
Select the User for which you wish to create the polygon by selecting the color indicator next to their name.
Using mouse clicks, select all points on the map that make up the desired polygon.
To remove an incorrectly placed point, right click on that point and the two points on either side will connect directly.
You can also drag and drop any point to adjust the polygon.
Once done creating the polygon, hit the Save button.
If you want to discard the created polygon and start over, hit the Cancel button.
Canceling a polygon requires a confirmation.
How to Edit polygons drawn in free hand
In order to edit a saved polygon, left click inside once.
The information window for the polygon will appear. It contains three buttons:
- Edit Polygon
Allows for editing the points of the polygon to change its size and shape.
- Delete
Removes the polygon from the map and its association to a User.
- Go to Info
Displays all info for the polygon, including Sales, Visits, Promotions, Employees, Number of Organizations and Specialists
Naming a free hand polygon
In the polygon information window there is a field that stores the name of the polygon
To Save the name of the polygon, hit the Enter button on the keyboard.
A Save confirmation notification will display.
How to view and Edit the responsible User for a free hand polygon
In the information window for the polygon, the responsible user is displayed.
A drop down allows for selecting a new User as responsible.
Drawing a Polygon by regions
Click on the Bruch Options button in the lower right hand corner.
Select Geo Division by Region layer
Hit Show
The system will display the border of existing regions.
Hit the Save button. Now we can distribute the drawn regions between Users
Click on the Brush button
Select the User to whom you wish to assign the territory by clicking on the color indicator next to their name.
Now by left clicking on the regions, we select the ones we wish to assign to this User.
Once complete hit the Done button
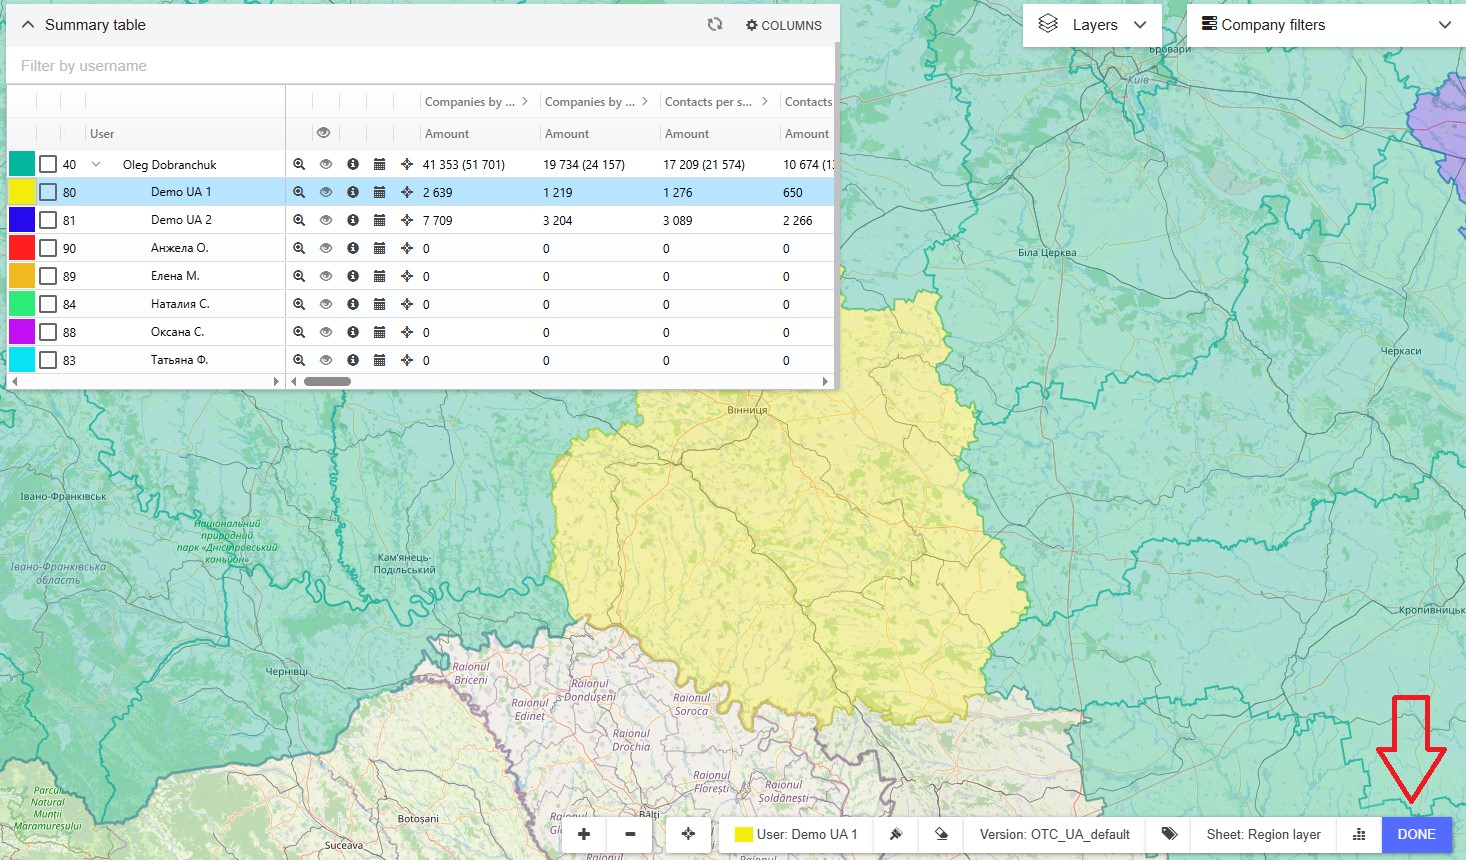 Button “Highlight unassigned polygons”
Pressing this button, the system will highlight in Red all polygons that have not been assigned.
Drawing Polygons by Cities
Select the Brush Options button in the lower right hand corner.
The Brush options window will open. Select Geo division by City layer.
Hit Show
The system will display the boundaries of predefined cities.
Hit the Save button
Now we can distribute the cities among the Users
Hit the Brush button.
Select the User to whom you wish to assign the city by clicking the color coded block next to their name.
Select the cities you wish to assign to the User by left clocking on them once.
Once done, hit the Done button to save.
Drawing Polygons by neighborhoods
Hit the Brush Options button located in the lower right hand corner.
Select Geo Division by District layer
Hit Show
The system will display the predefined districts or neighborhoods.
Hit the Save button. Now we can distribute the districts among Users.
Hit the Brush button
Select the User to who we wish to assign the territory by clicking on the color coded block next to their name.
Now left click once on the territories you wish to assign to the User.
To save, hit the Done button
Drawing Polygons by postal code.
Follow the same steps above for drawing by Region, City or District.
Drawing Territories by Points
Hit the Brush Options button located in the lower right hand corner
Select Geo Division by Region, City or District.
Select Split by Points
There are three available parameters:
- Company Types
- Specialization
- Polygons
Company Types
Select the type of organizations to include
Specialization
If selected, the territory will be created to include at least one target with the selected specialization.
Polygons
Only the Territories selected will be done by points
Hit the Show button
The system splits the Territories by points and creates new Bricks
Hit the Save button
After Save, the system saves the Bricks to the Database. There is a Save Status bar at the top of the screen. After save completes the status bar will disappear.
Now we can distribute the Bricks among our users
Hit the Brush button
Select the User to whom we wish to transfer the Territory by selecting the color coded box next to their name.
Now click on the Territories we wish to assign to that User.
Once complete, hit the Done button.
How to view a Drawn Territory
Hit the Brush button
To the left, an icon with an Eraser will appear.
Select the territories you wish to delete by clicking on tham.
Hit the Done button
How to Export Data from a Pivot Table in Excel
All data related to polygons displayed in the Pivot Table can be exported to your local computer in Excel or CSV format.
Simply right-click anywhere inside the Pivot Table.
Select Export, then choose either Excel Export or CSV Export.
This way, the polygon comparison data will be saved to your computer in table format for further analysis.